We wrote this article to help those working with Google Tag Manager (GTM), but if that description doesn’t fit you – fear not!
GTM is the control center for tracking what happens on your website or app. You can add, edit, and manage which events are sent to your various tools, whether for analytics, conversion tracking, or remarketing. You can also transform your data, fix tracking bugs, and test changes before they go live – all from one place. If developer time is hard to come by, GTM allows you to implement new tracking and fix issues yourself… but the most reliable and consistent tracking is the result of a good relationship between your developers and your tracking efforts.
Now let’s dive into the tips and tricks from our experts!
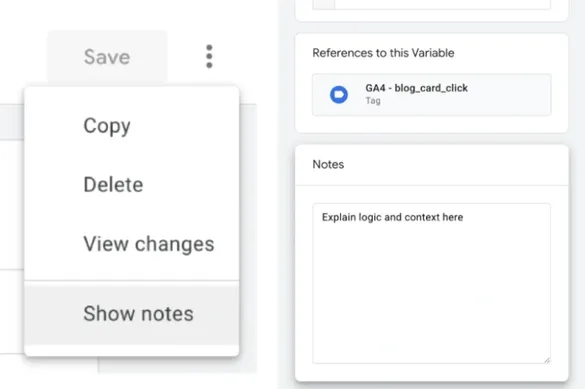
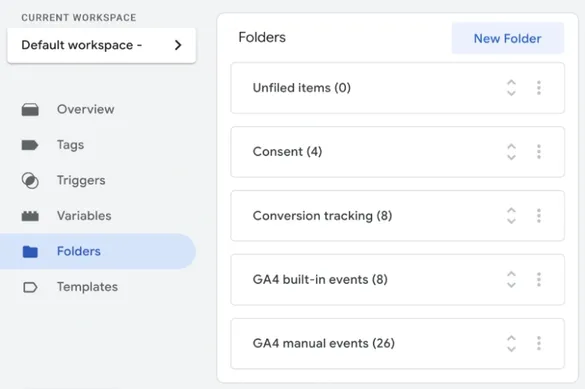
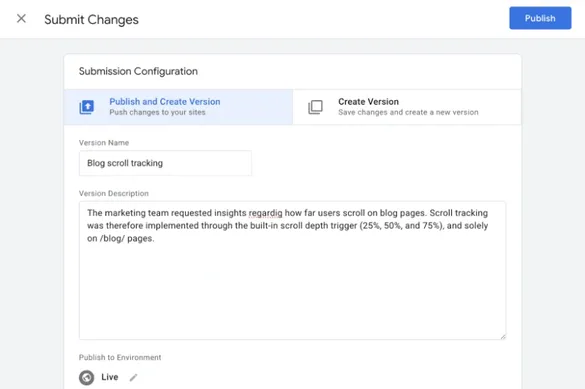
Don’t trust that anyone else will understand your reasoning… much less your future self. Use Google Tag Manager’s built-in documentation features to explain logic, changes, and context. These may seem somewhat basic tips, but we assure you: they’re underutilized.



Google Analytics 4 (GA4) gives you plenty of built-in dimensions and metrics, but sometimes you need more – like adding a page type or a cleaned page location to every event. In any case, you want it to be applied to every... single... event...
So imagine the headache of realizing you forgot to add it to every... single... tag.
Or having to update it across every... single- Okay, you get the picture.
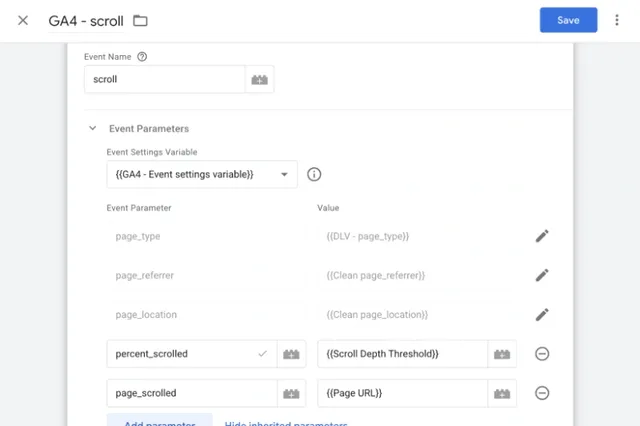
The settings variable is your knight in shining armor! Create an event settings variable with your global parameters, then reference it in every GA4 event tag. Update the variable, and you’re done – the change will be reflected across all the event tags it’s used in. You can do the same with a configuration settings variable if you want to share parameters across multiple Google tags too.
💡 Psst! Speaking of event and Google tag parameters… Have you ever set parameters in the Google tag, thinking they will automatically trickle down to the event tags that trigger after it? You’re right… mostly. But you might run into an issue if said parameters aren’t available or fail to evaluate when the Google tag runs. To be safe, always set them on the event tag too!
Many ecommerce shops have at least two versions of their website or app: a production and a testing environment. The purpose of the latter is to test new functionality on the website before going live on the live production site. Many implement separate GTM containers for this…
… but why would you create multiple setups that aim to do the same thing? It also means double the maintenance and plenty of room for things to get out of sync. Instead, use a single GTM container for them all by using environments! GTM environments let you publish different container versions to different site variants, so you can test changes in your test site without affecting production.
To set it up, follow the steps described in Google’s documentation. You can then publish a GTM workspace to any environment of your choice… preferably your testing environment first 😄
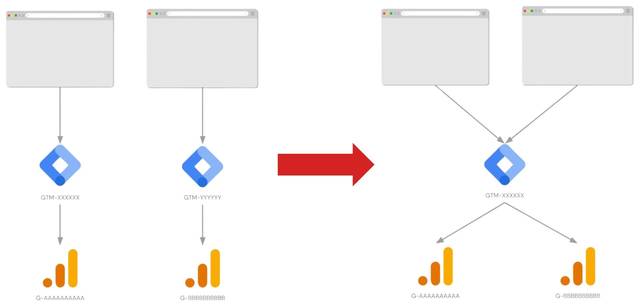
Do you manage multiple brands, each with its own website and GTM container? If those brands share infrastructure or digital goals, you’re probably duplicating a lot of work – and making it harder to keep tracking consistent.
Instead of copying the same tags and fixing the same bugs in several locations (and hoping you don’t miss anything), bring it all together in a single GTM container! Use the same tags, triggers, and variables across multiple brands, and rely on lookup tables to communicate which ID the tag should trigger for.
Truth be told, this isn’t as easy as our GTM environments tip – at least for established multisites with plenty of existing tracking. Our tracking implementation specialist Oskar Pettersson details the rigorous steps to implement unified tracking for Nordic Nest Group here – but also the immense benefits!
Admittedly, it feels great to master JavaScript and create advanced custom tracking solutions in GTM – all on your own. With that said, here’s why you should use built-in or community templates when possible instead:
There’s honor (and efficiency) in using what already works!
-----------------------------
A few good habits go a long way, so document, organize, consolidate, and use the tools at your disposal. It will save you time, make tracking easier for others to understand, make tracking easier for you to understand, and perhaps most importantly: your data will thank you too.
We’re very well aware that cleaning and documenting is often downgraded on the priority list, so if your GTM containers are in dire need of cleaning – you can hire a Conversionista cleaning crew! Reach out to us below 👇
Ready to accelerate your digital growth? Add your details here or email us at hej[a]conversionista.se and we’ll get back to you.
